Docusnap365 Quick Start
3 minute read
Get started
There are very few steps required to successfully get started with Docusnap365. These are:
- Deployment of the Docusnap365 Environment
- Installing the Docusnap Enterprise Gateway
- Registering and Pairing the Docusnap Enterprise Gateway
- Discovery of Windows Systems
- Discovery of Network Devices
- Initial Results
Deployment of the Docusnap365 Environment
To get started with Docusnap365, a user account is required, which can be created via the Docusnap365 trial form. After registering, you’ll receive an email with a link to set up your user account. Once the credentials are completed, the Docusnap365 environment will be deployed.
Let’s go
After successfully logging in to docusnap365.com, Docusnap365 opens for the first time. To conduct a discovery of your IT infrastructure, the Docusnap Enterprise Gateway is essential, serving as the interface between Docusnap365 and an organization’s IT infrastructure. The Docusnap Enterprise Gateway must be installed on a system that resides in the organization’s IT infrastructure.
Installing the Docusnap Enterprise Gateway
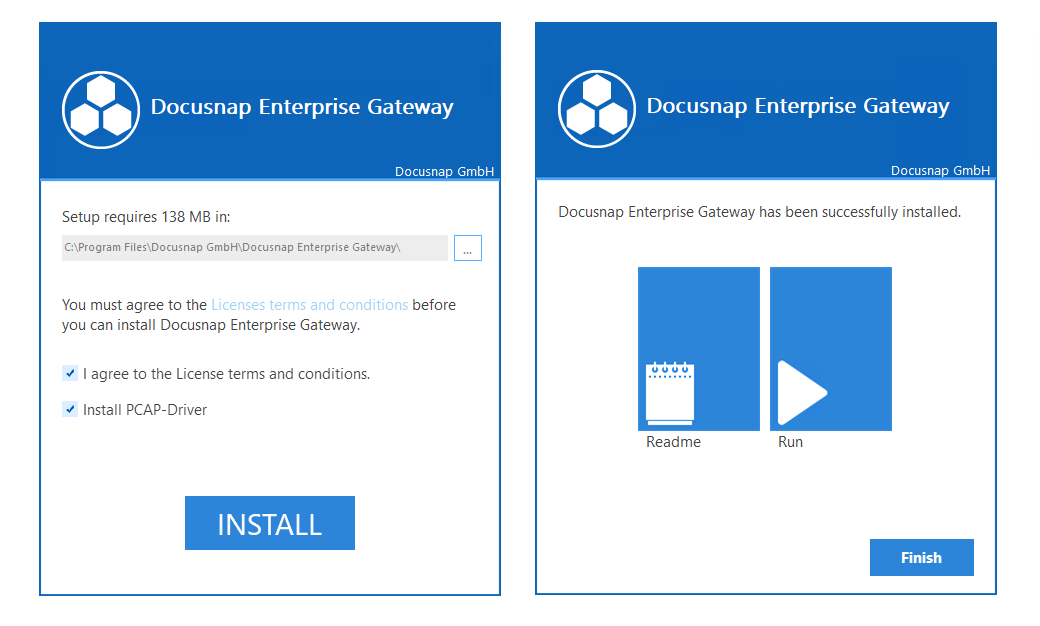
On the landing page, within the section “Docusnap Enterprise Gateway”, the Docusnap Enterprise Gateway will be available for download. The installation has to be executed with local administration rights. After confirming the default path and the user agreement, the installation can be performed.

Registering and Pairing the Docusnap Enterprise Gateway
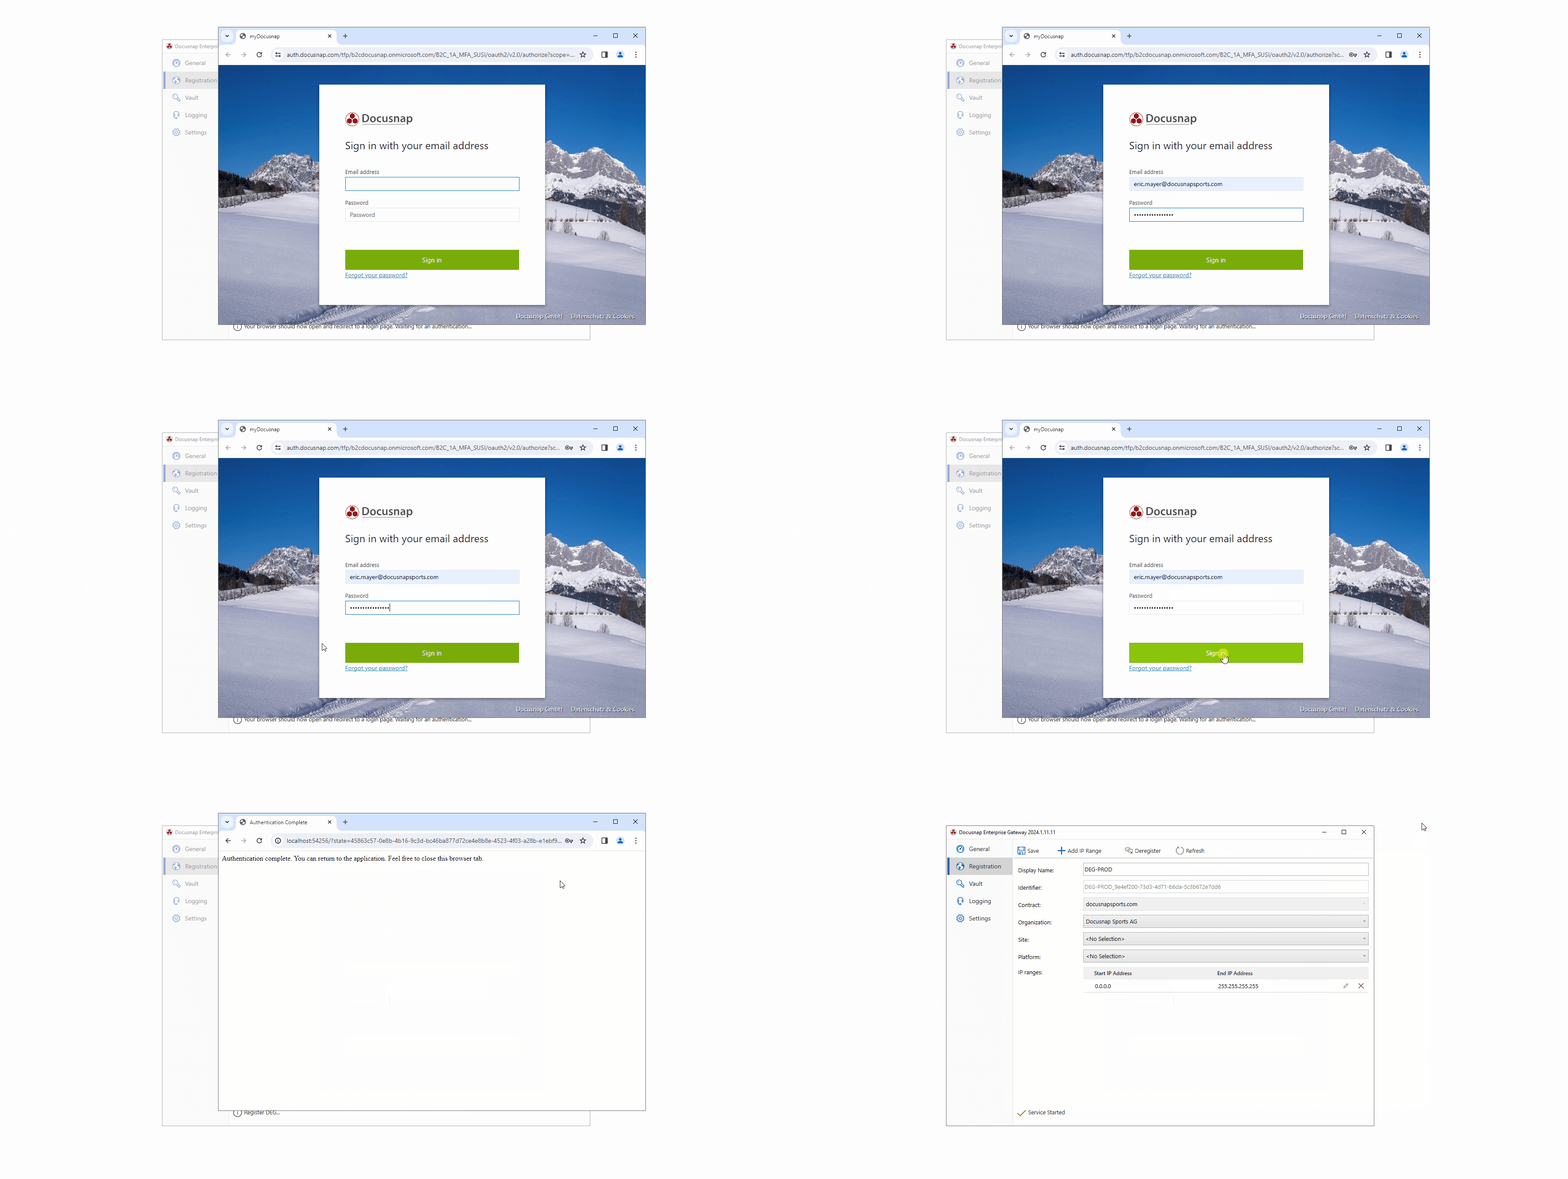
After the installation is complete, the default browser will automatically open the login page for Docusnap365. Once the login is complete, the Docusnap Enterprise Gateway has to be registered. This process may take a few seconds to complete. During registration, the Docusnap Enterprise Gateway is paired with the isolated Docusnap365 infrastructure. If the Docusnap Enterprise Gateway was paired successfully, it should be listed as “Active” on the main Docusnap365 dashboard.

First Discovery
The term ‘Discovery’ encompasses both the automated collection of data related to the IT infrastructure (hardware, systems, Microsoft 365, etc.) and the subsequent transfer, preparation, and storage of this information. These data sets form the foundation for documentation and analysis within Docusnap365. The “Discovery” section in the main menu hosts the discovery wizards and job management tools. Users can initiate discovery jobs either immediately or schedule them as needed.
Discovery of Windows Systems
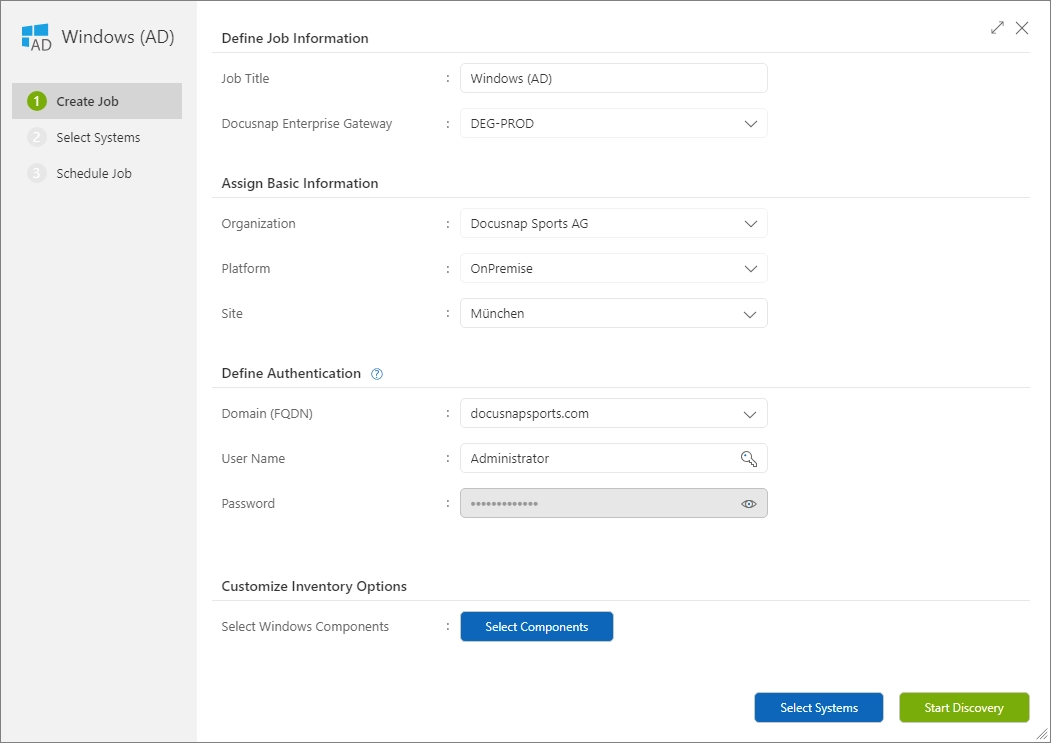
The ‘Windows (AD)’ wizard can be accessed through the navigation pane on the left. In the Discovery interface, the Docusnap Enterprise Gateway, organization, platform and site are automatically prepopulated with the appropriate information, if configured. Windows Systems and Hardware are assigned based on this information during the Discovery process.
In the ‘Info’ section, you need to provide the Fully Qualified Domain Name (FQDN) in the input field ‘Domain’. Afterwards, the credentials of an AD user with adequate privileges (administrator) have to be specified for User name and Password. Optionally, you can permanently store these credentials in the vault. More information about the vault can be found here.
Once all the information has been entered, the Discovery can be started.

Interactive Jobs
The ‘Interactive Jobs’ view shows all jobs that have been executed interactively so far. The previously created job “Windows (AD)” is immediately visible here and the current execution state is displayed in the “Current state” column.
Discovery of Network Devices
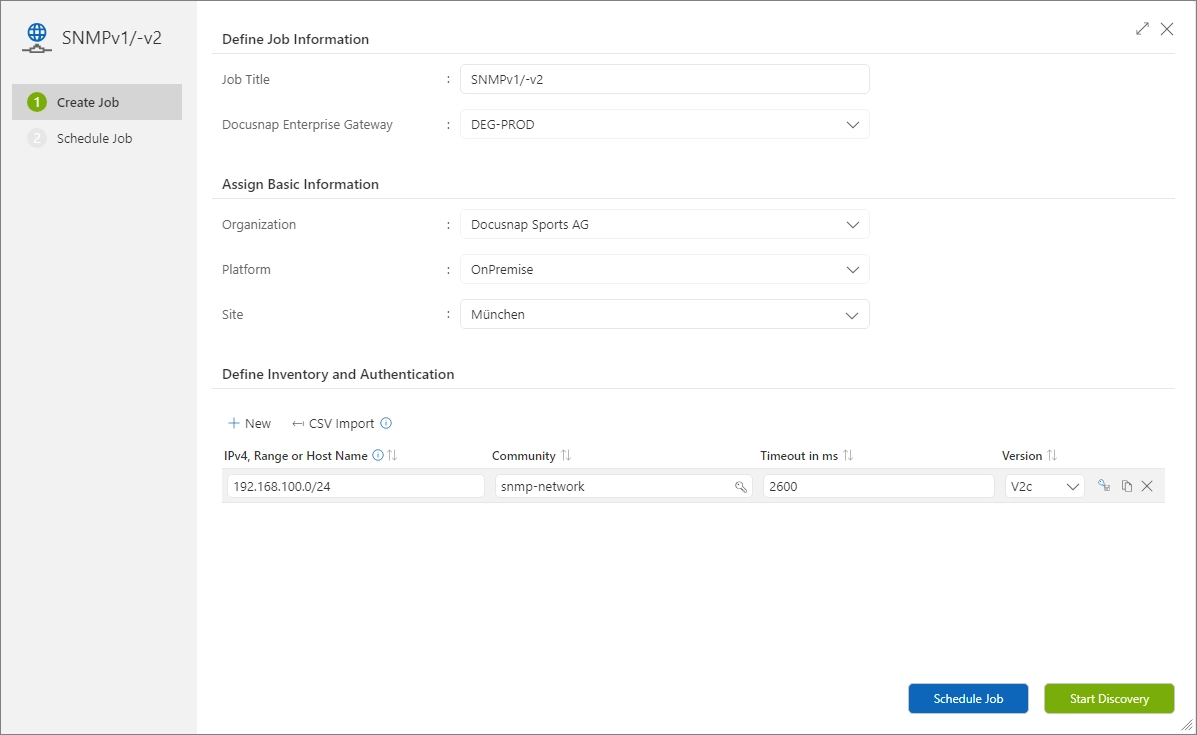
The second Discovery Job captures printers, switches, and other devices that are on the network of the system on which the Docusnap Enterprise Gateway has been installed via the SNMP protocl. For this purpose, the name of the SNMP community has to be known. By default, device manufacturers use the community ‘public’.
The wizard is started by clicking on SNMPv1/-v2 in the ‘Discovery’ area. In the ‘Logon information’ area of this dialog, the desired IPv4 range must be entered in CIDR notation (e.g. 192.168.100.0/24). If required, the name of the SNMP community must be adjusted in the ‘Community’ input field.
Once all the information has been entered, the discovery can be started.
