Working with Filters
2 minute read
Introduction
Especially in large file server structures, it can quickly become unclear which folders are actually relevant for a specific user. The integrated filter function in Docusnap365 allows you to narrow the analysis down to relevant directories — based on the effective permissions of a specific principal.
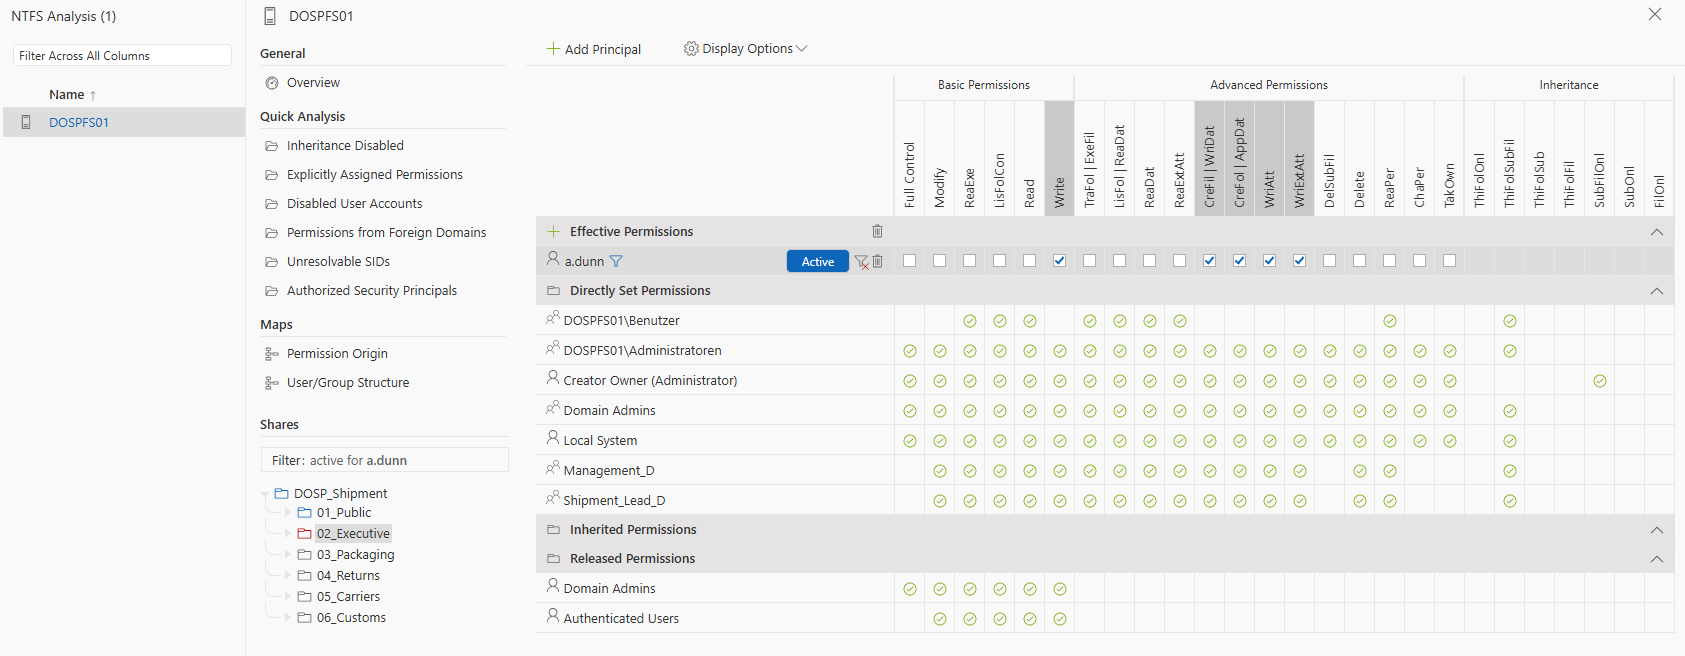
Select Principal
- Open an existing analysis and add a user or group to the analysis via “Add Principal” as described in the previous chapter.
- Once a principal is active, an option to filter by effective permissions appears at the top of the analysis view.
Activate Filter
Activate the filter to display in the share tree only those directories that the selected user or group actually has access to — based on the combined calculation of share, inheritance, and explicit permissions.
- The share tree is automatically reduced.
- The matrix still shows all associated permissions.
- Other folders are completely hidden.
Advantages of the Filter Function
- Quickly focus on relevant folders
- Ideal for large structures with thousands of directories
- Reduces data noise during analysis
- Supports targeted questions:
“Where does user X have access?” — and only there
Typical Use Case
Example: The user
a.dunnis added to the analysis. By activating the filter, only those folders thata.dunnhas effective permissions to are displayed — e.g.\\DOSPFS06\HR.
In the matrix, you can see whether a.dunn has, for example, read, modify, or advanced permissions — and whether the rights are set explicitly or inherited.
Recommendation for Audits
This filter function is especially valuable in the following scenarios:
- Audit preparation
- Permission control for privileged accounts
- GDPR information requests
- Before/after comparisons for permission changes