Quick start
6 minute read
Introduction
The fictitious DocusnapSports GmbH, a medium-sized specialist in cycling products, encompasses various departments that work with a wide range of hardware such as laptops, desktop PCs, servers, printers, and networking devices.
Over the years, as the number of hardware components has grown, managing these devices has become increasingly challenging. The company lacks a clear overview of which devices remain in inventory or when they were purchased. This results in inefficient workflows and potential losses.
Given that Docusnap365 is already in use, there’s a proposal to expand the system so that each hardware component receives a unique asset number. Additionally, information like the purchase date, warranty start, and warranty duration should be captured.
Requirements
- Creation of a dedicated tab for managing DocusnapSports GmbH’s asset information.
- Establishment of a group with attributes for asset number and purchase date.
- Establishment of another group with attributes for warranty start and warranty duration.
- Incorporation of the aforementioned attributes into an existing hardware object.
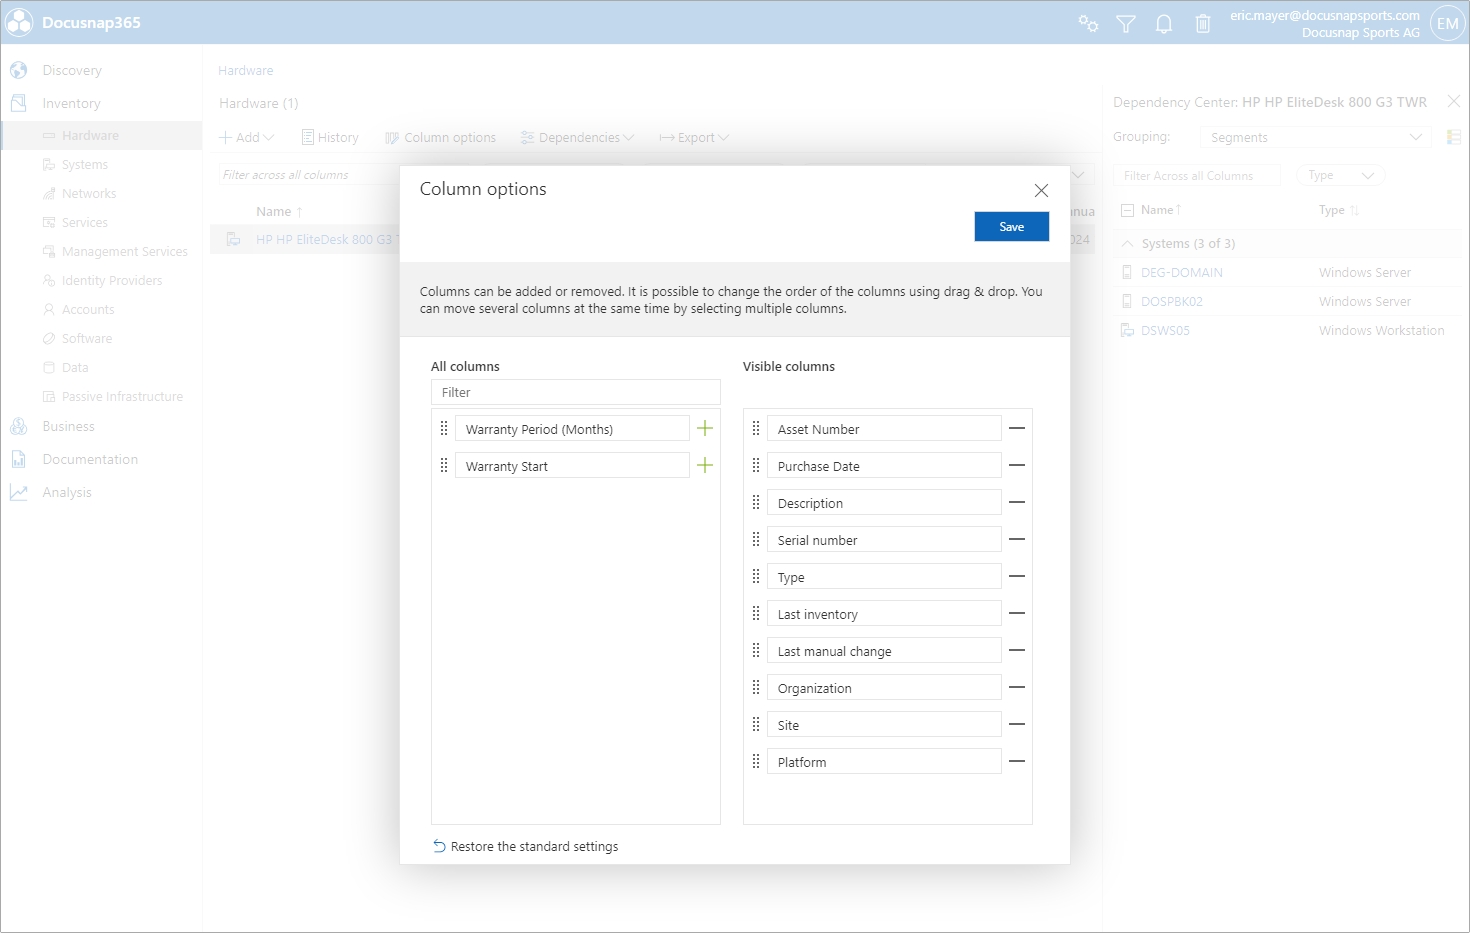
- Display of the asset number in the “Hardware” segment’s overview list.
Segment Selection
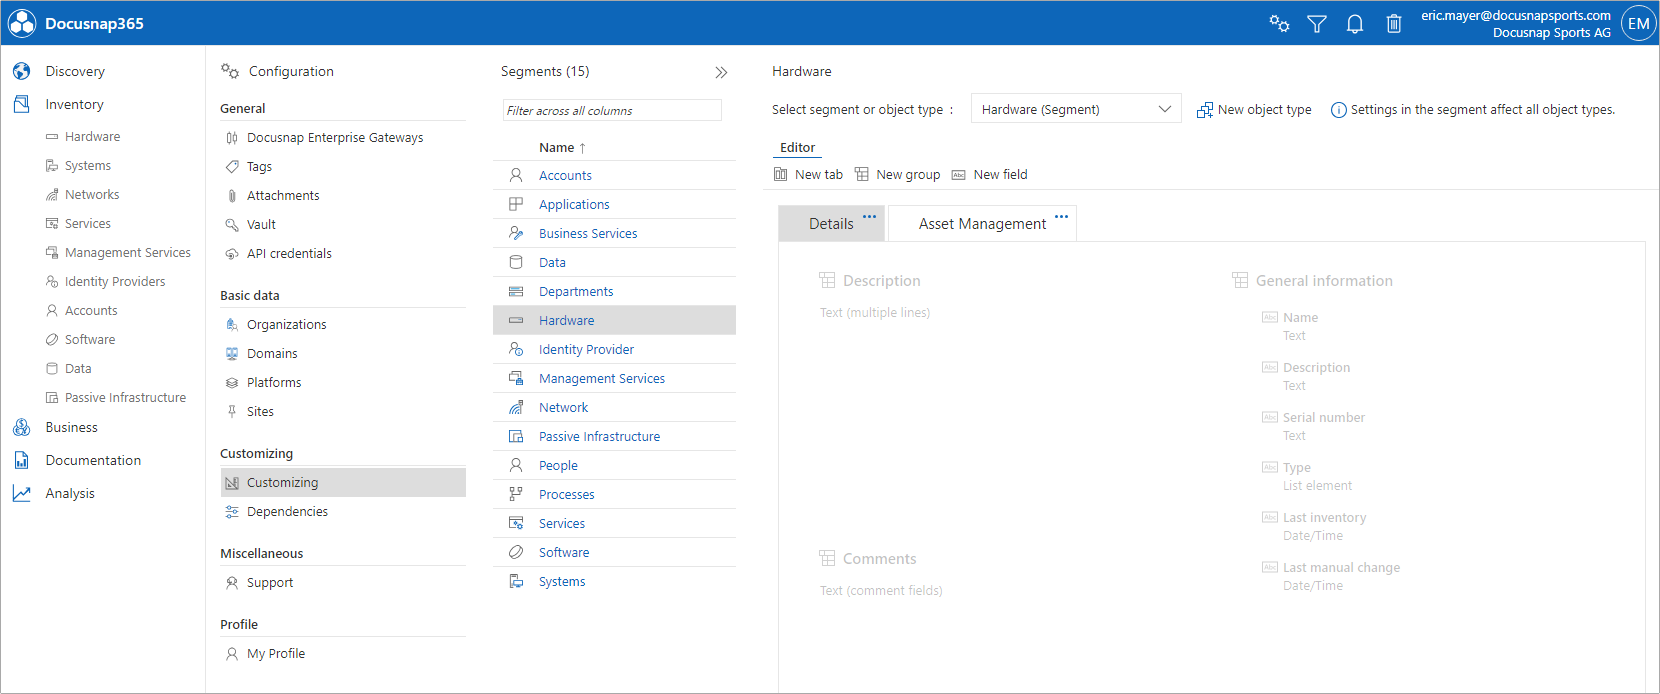
To access the Customizing Editor in Docusnap365, click on the gear icon in the top right corner to enter the configuration. Next, choose the “Customizing” menu option. In the following view, various segments are listed on the left, and the right side is designated for editing the chosen segment. For this use case, transition to the “Hardware” segment. Here, an editable version of the “Edit” dialog is provided. Elements that are grayed out are predefined by Docusnap365 and remain unchangeable. Using the “Select Segment or Object Type” dropdown, determine whether modifications should be applied to a specific object type or all object types within this segment.
Per the outlined requirements, a dedicated tab for information management should be created in the “Hardware” segment for all items. If “Hardware (Segment)” is already chosen in the “Select Segment or Object Type” dropdown, all adjustments will automatically be applied to every object type in this segment.
Creating a Tab
Tabs, allow a user-customized, structured visualization of data. By clicking on “New Tab,” a settings window opens where the properties of the new tab can be defined:
- Identifier: Acts as a unique identifier for the respective tab but remains hidden. Only letters (a - z, A - Z, ä - ü, Ä - Ü) and underscores (_) are permitted. Spaces are prohibited.
- Text (German) & Text (English): Displayed based on the language chosen in the Docusnap365 interface.
For this use case, the identifier “tab_assetmanagement” is provided in the “Identifier” field. “Asset Management” is entered in both the “Text (German)” and “Text (English)” fields.

Creation of a Group
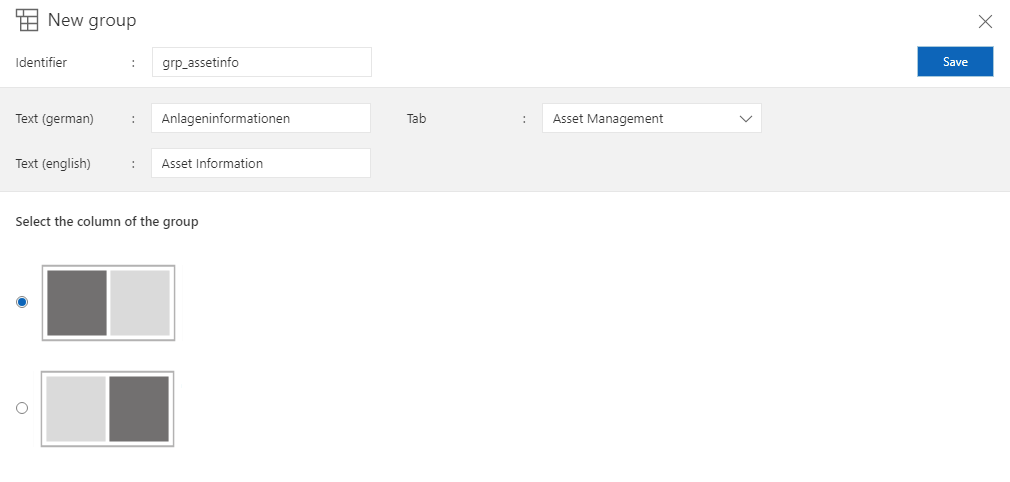
Groups serve as structural elements within a tab, enabling the thematic bundling of information. New fields or properties can be added within each respective group. The groups are arranged in a two-column format within the tab, divided 50:50. Clicking on “New Group” opens a dialog box where the following settings can be configured:
- Identifier: Serves as the group’s label but isn’t displayed. Only letters (a - z, A - Z, ä - ü, Ä - Ü) and underscores (_) are valid. Spaces are not accepted.
- Text (German) & Text (English): Content shown depends on Docusnap365’s language setting.
- Tab: Designates the tab where the group will be displayed.
- Layout: Dictates the column in which the group will appear.
For this use case, the identifier “grp_assetinfo” is provided. The English and German translations are “Asset Information” and “Anlageinformationen” respectively. The “Asset Management” tab is selected from the dropdown menu, and the first option is picked for column placement.
Similarly, for the Warranty Information group, “grp_warranty” is entered. The English and German labels are “Warranty Information” and “Garantieinformationen”. The “Asset Management” tab is selected again, with the second option chosen for column positioning.
Creation of Fields
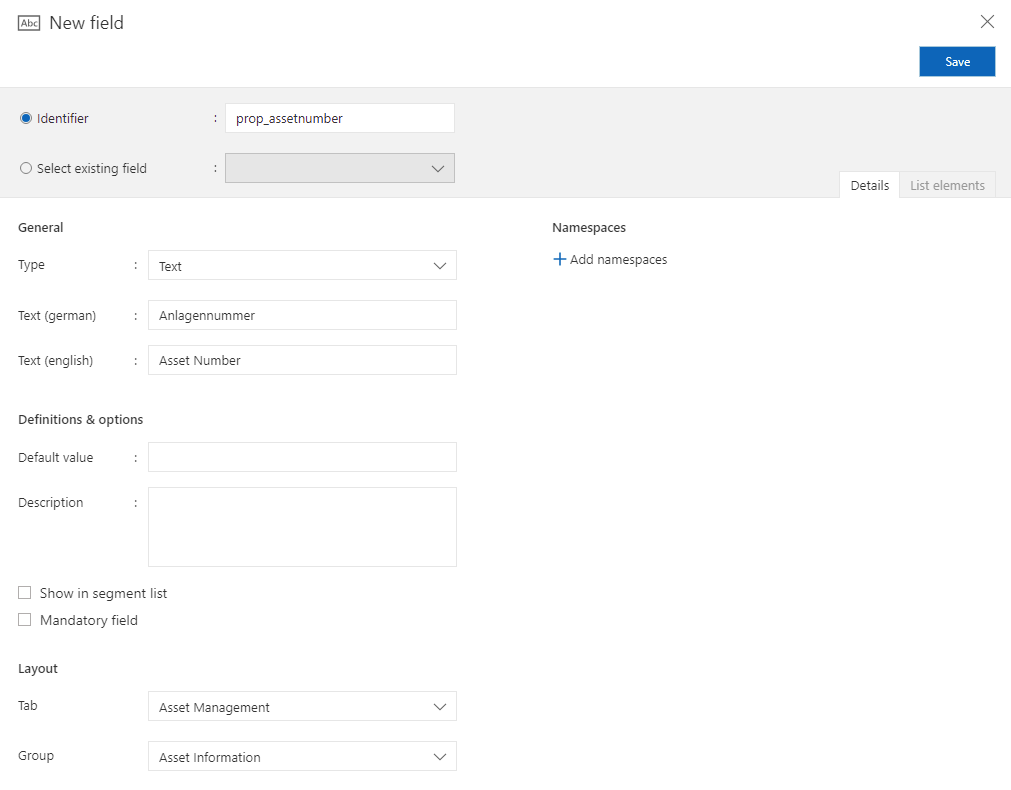
While tabs and groups primarily contribute to structuring, fields represent the actual input areas for data storage. A new field can be created either by clicking on “New Field” or by hovering over the desired group with the mouse and then clicking on the plus symbol (+). In the dialog window for field creation, the following settings are possible:
- Identifier: Serves as an identifier for the group but is not displayed. Valid characters are a - z, A - Z, ä - ü, Ä - Ü, and underscore (_). Spaces are not allowed.
- Text (German) and Text (English): Displayed based on the language selection in the Docusnap365 interface.
- Data type: Defines the data type of the new field. In the context of the specific use case, the following data types are required:
- Text for the asset number: Allows the input of letters (a - z, A - Z, ä - ü, Ä - Ü), special characters, spaces, and numbers.
- Number for the warranty period in months: Accepts both positive and negative integers and decimals, where decimal places must be separated by a comma.
- Date for the purchase date: Can be selected through a calendar widget or manually entered.
For a quick start, only the “Tab” and “Group” settings are relevant here, determining on which tab and within which group the information should be displayed.
Asset Number
In the “Identifier” field, “prop_assetnumber” is entered as the identifier. For the “Asset Number,” the data type “Text” is selected. In the language fields, “Anlagennummer” should be entered for “Text (German)” and “Asset Number” for “Text (English)”. In the layout section, the “Asset Management” tab is selected, and “Asset Information” is chosen as the group property.
Purchase Date
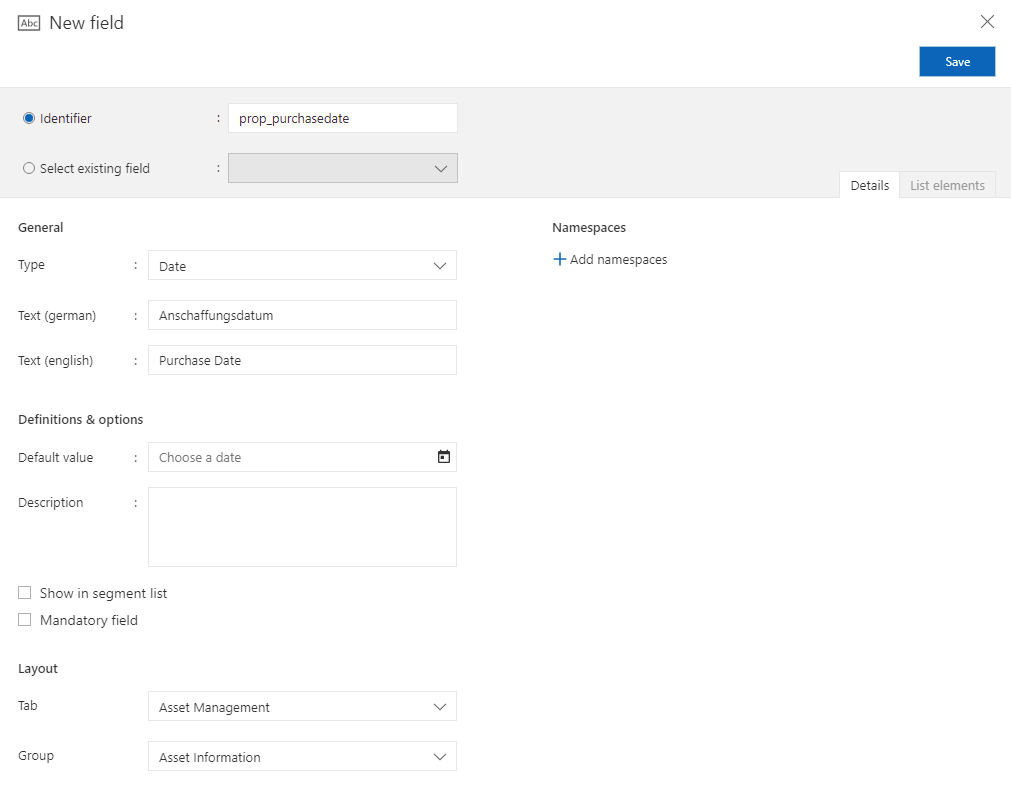
In the “Identifier” field, “prop_purchasedate” is entered as the identifier. For the “Purchase Date,” the data type “Date” is selected. In the language fields, “Anschaffungsdatum” should be entered for “Text (German)” and “Purchase Date” for “Text (English)”. In the layout section, the “Asset Management” tab is selected, and “Asset Information” is chosen as the group property.
Warranty Start
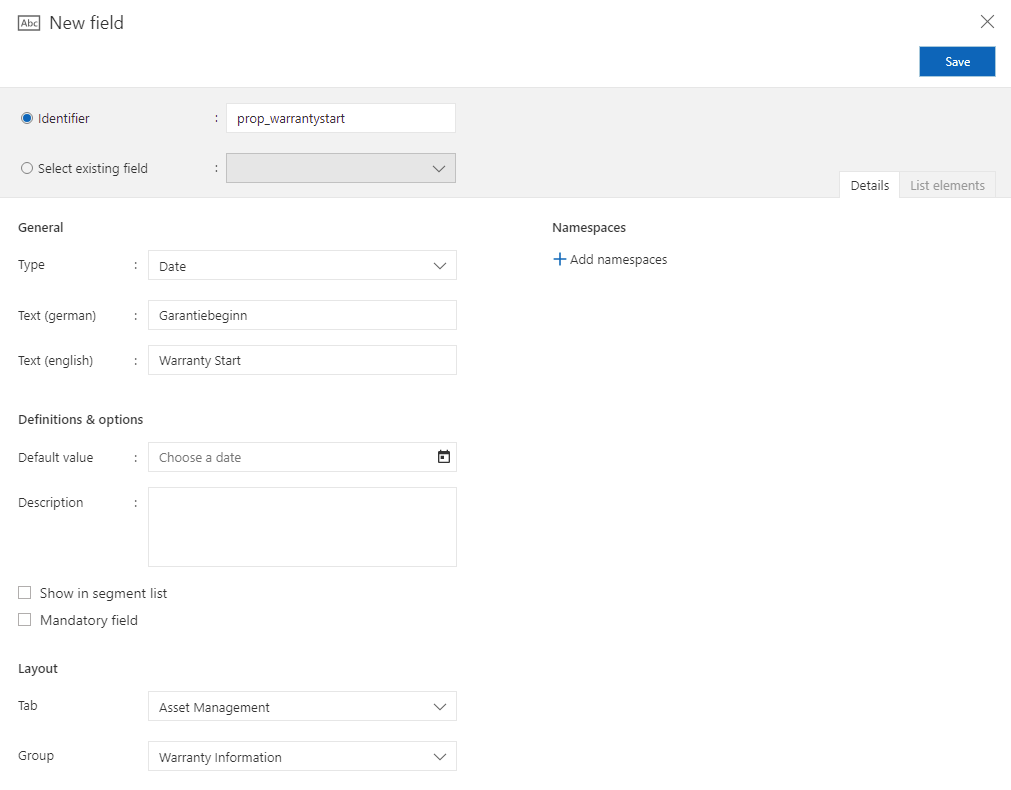
In the “Identifier” field, “prop_warrantystart” is entered as the identifier. For the “Warranty Start,” the data type “Date” is selected. The terms “Garantiebeginn” for “Text (German)” and “Warranty Start” for “Text (English)” are entered into the respective language fields. In the layout section, the “Asset Management” tab is selected, and “Warranty Information” is set as the group property.
Warranty Period
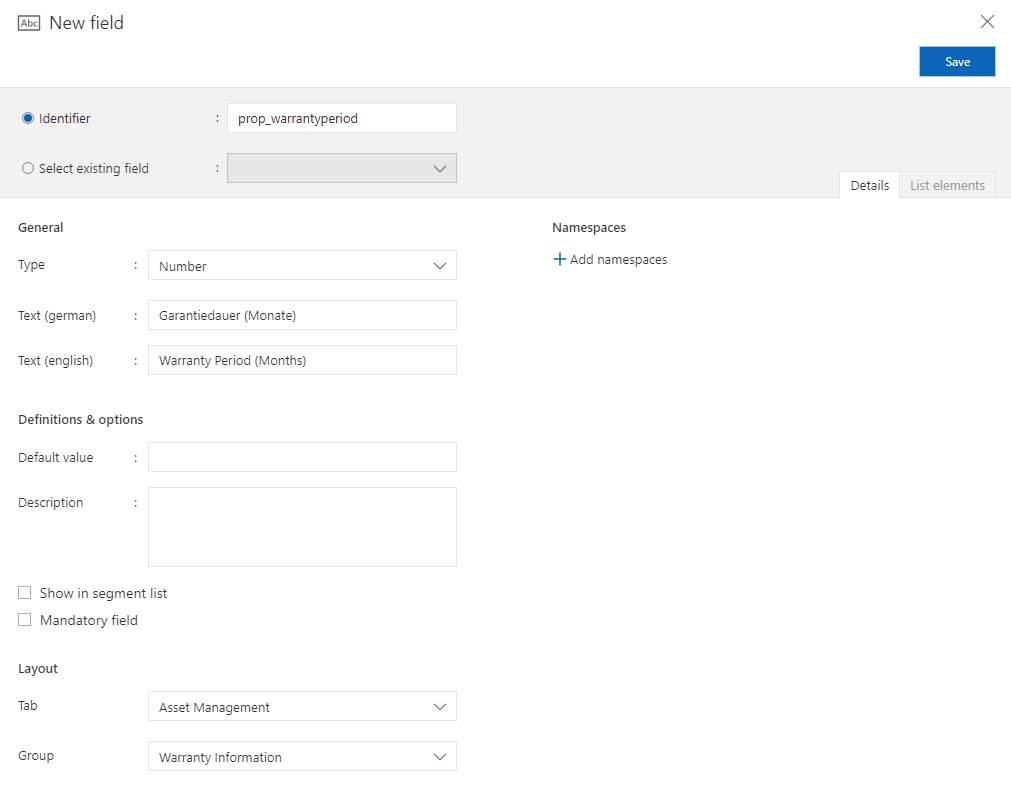
In the “Identifier” field, “prop_warrantyperiod” is entered as the identifier. For the “Warranty Period,” the data type “Number” is selected. The terms “Garantiedauer (Monate)” for “Text (German)” and “Warranty Period (Months)” for “Text (English)” are entered into the respective language fields. In the layout section, the “Asset Management” tab is also selected, and “Warranty Information” is set as the group property.
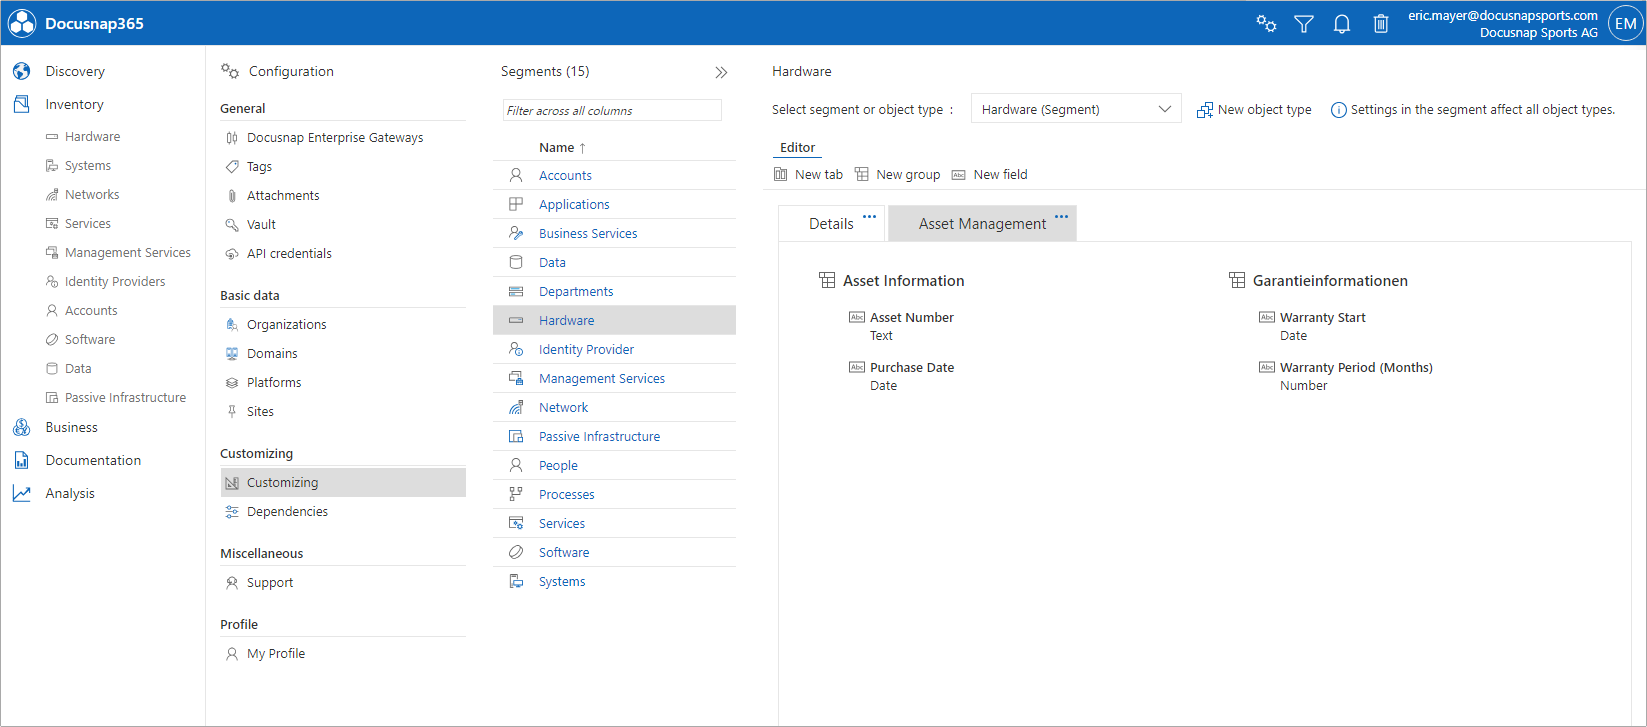
After the tab, groups, and fields have been successfully added, the editor view should look as follows:
Editing a Hardware Object
To edit a hardware object, open the “Inventory” section in the left menu and switch to “Hardware.” In the “Hardware” section, you will find a list of existing objects. Select the desired hardware object and click on the pencil icon that appears when hovering the mouse over the object. If there is no existing hardware object, a new one can be created using the “Add” button.
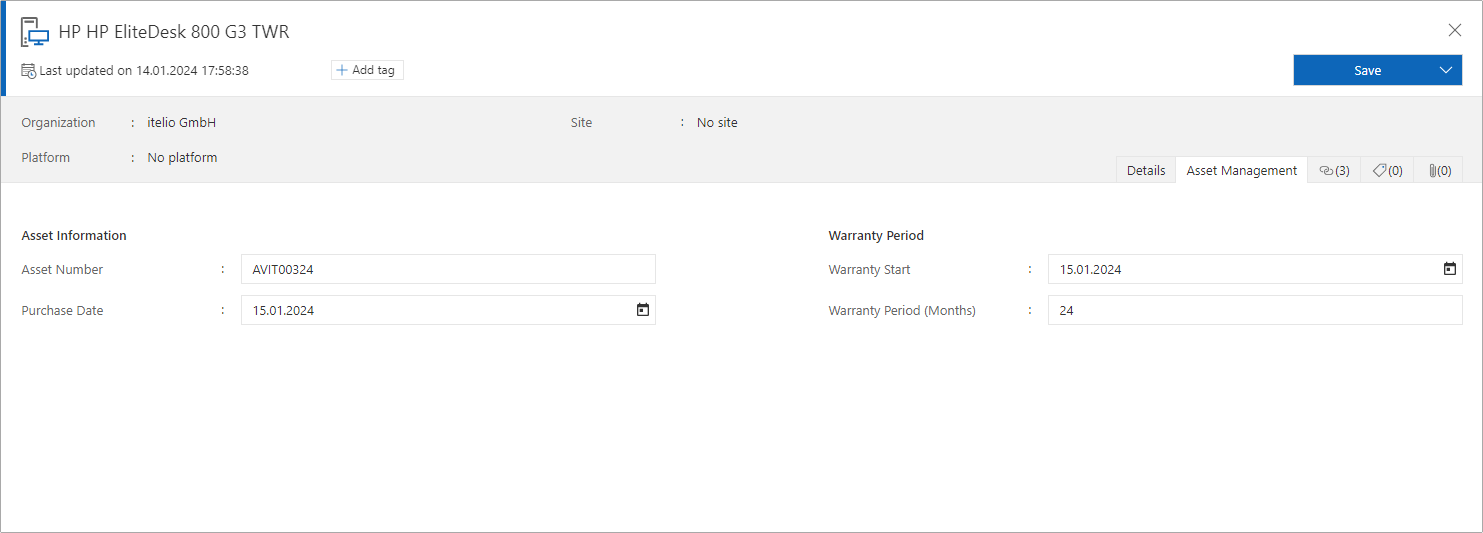
Displaying the Asset Number
After individual customization and entering a value for the asset number for a hardware object, this information can be displayed in the overview list of the hardware segment. To do this, open the column selection dialog and add the asset number either by drag-and-drop or using the plus icon to the “Displayed Columns”. Subsequently, the “Asset Number” field should appear in the overview list in the desired order.
