Creating Data Sources
2 minute read
Introduction
This section explains the steps involved in creating a data source. Access to data sources is available via the gear icon in the upper right corner. After selecting the “Data Sources” menu item and clicking on the “New” button, the corresponding dialog opens.
Create New Data Source
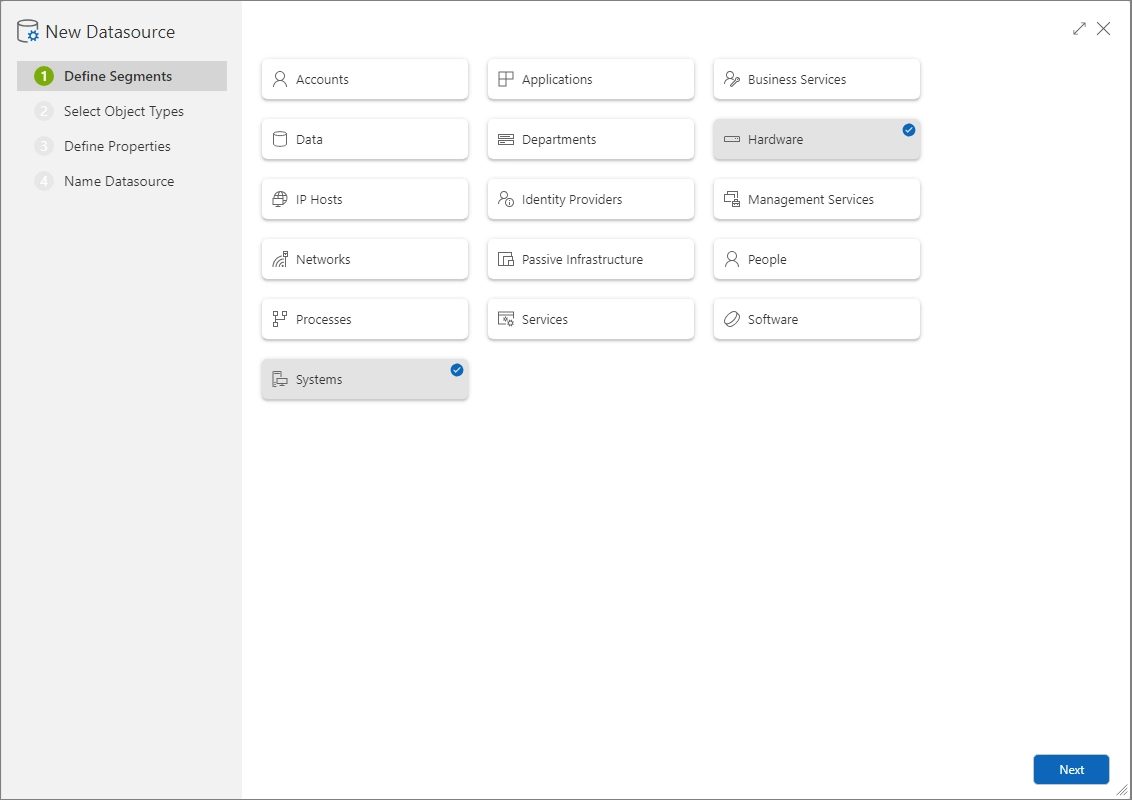
Step 1: Segment Selection
- Initially, various segments are presented in the data source creation dialog window.
- The required segments can be selected by clicking the corresponding checkboxes. Multiple selections are possible to design a more comprehensive data source.

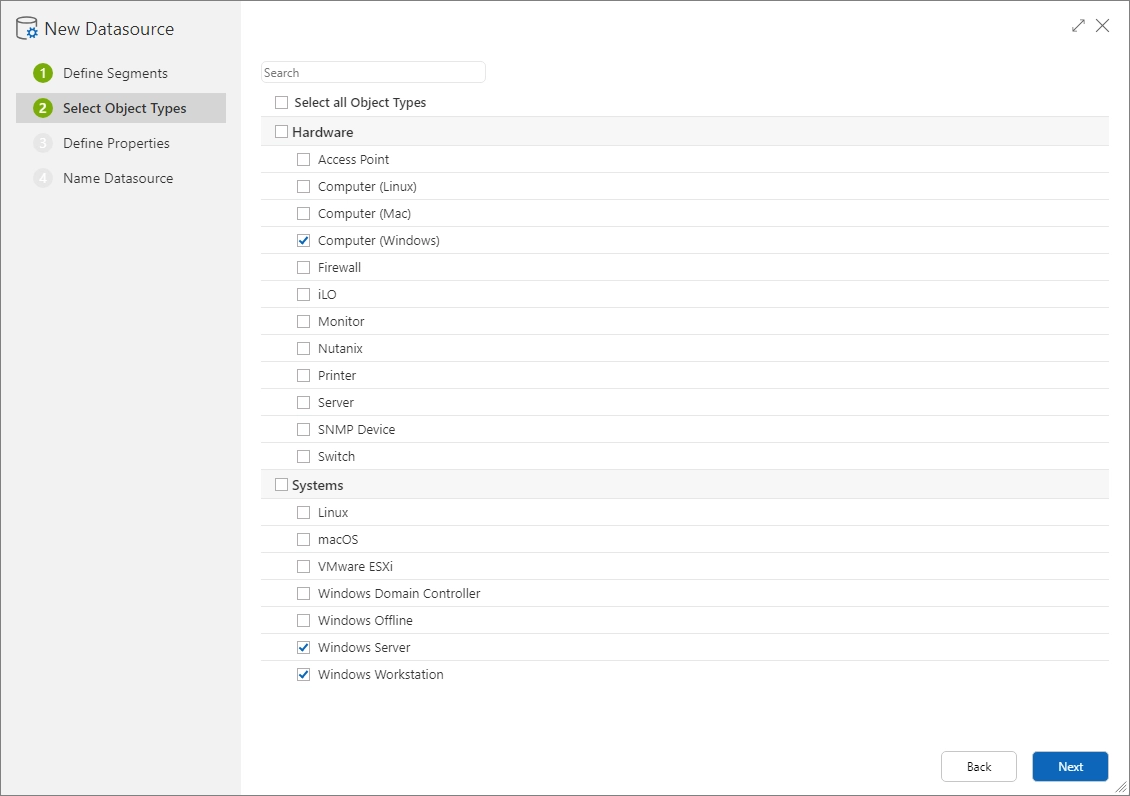
Step 2: Determining Object Types
- Next, the object types defined within the selected segments are selectable. This includes custom object types if available.
- The relevant object types are chosen by marking the corresponding checkboxes.

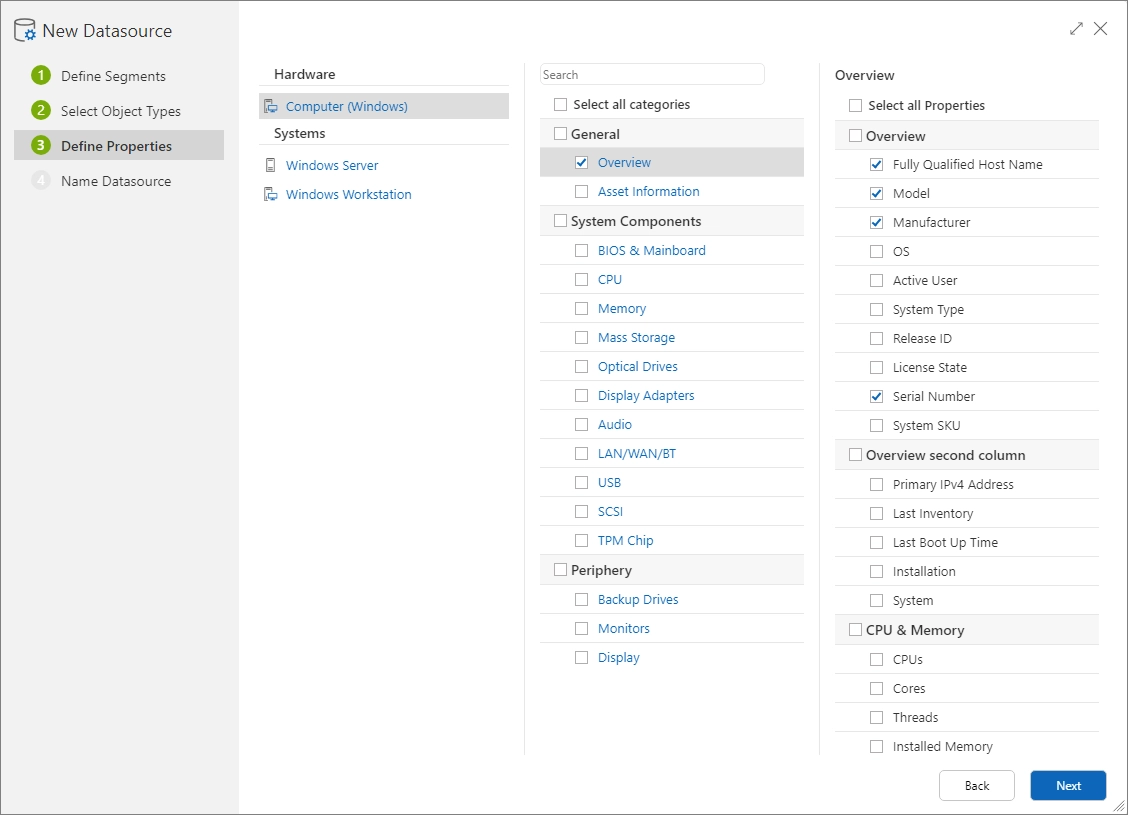
Step 3: Selecting Properties
- The next step involves determining specific properties of the selected object types.
- Clicking on a category includes all related properties. To select specific properties, the desired category is selected and individual properties are marked.
- An icon next to a category indicates a more detailed structure. Clicking the icon opens a dialog where specific categories or properties can be selected.

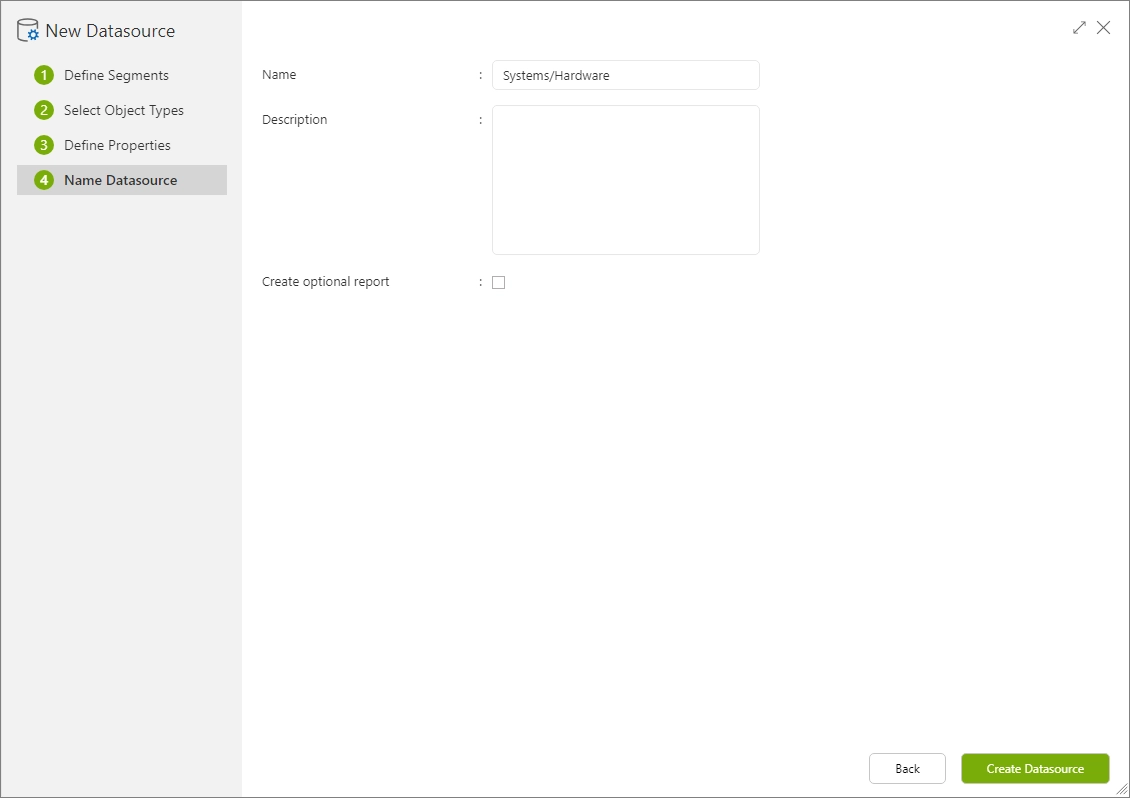
Step 4: Defining the Data Source
- In the final step, a name is assigned to the new data source and the definition is completed.

After the data source has been saved, the information is extracted from the original data based on the definition and stored in a separate table structure.