Quick Start
2 minute read
Introduction
DocusnapSports GmbH, specializing in cycling products, uses a variety of IT equipment such as notebooks, desktop PCs, servers, printers, and network equipment. To meet current requirements, a minimum monitor size of 27 inches has been set for the company. Additionally, each workstation should be equipped with two monitors.
Requirements
Since Docusnap365 is already used for IT documentation, a detailed evaluation of the existing monitors is necessary. The following evaluations should be provided:
- Data source for an overview of all monitors with their screen diagonal size.
- Data source for an overview of workstations and their connected monitors.
Note: This quick start guide focuses on creating data sources for conducting evaluations based on them. An explanation of the terms segments, objects, and object types can be read here.
Data Source for Monitors and Their Screen Diagonal
Create Data Source
To define a data source in Docusnap365, click on the gear icon in the upper right corner and open configuration. Under “Data Sources and Reports,” select “Data Sources,” which will display a list of existing data sources.
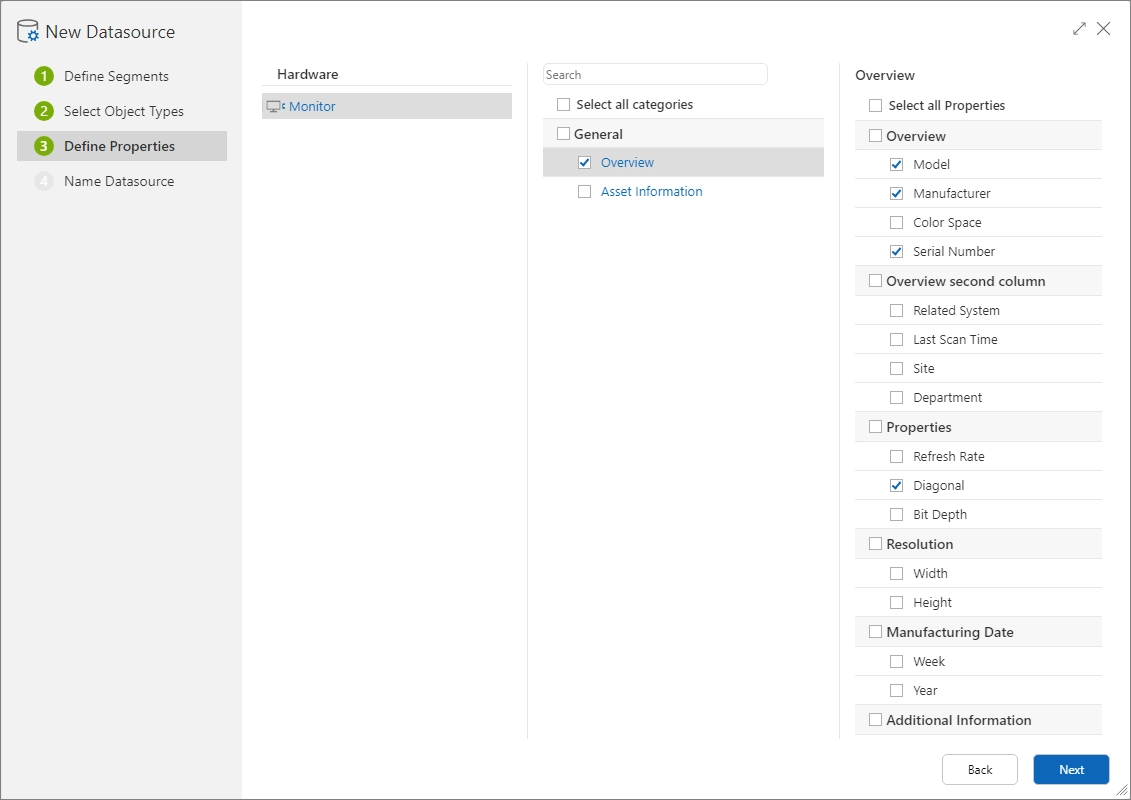
- Click “New” to start the data source creation wizard:
- Select segment: “Hardware”
- Set object type: “Monitor”
- Select properties:
- Overview area: Model, Manufacturer, Serial Number, Diagonal
- Enter data source name: “Monitor_Overview”
- Save data source

Data Source Preview
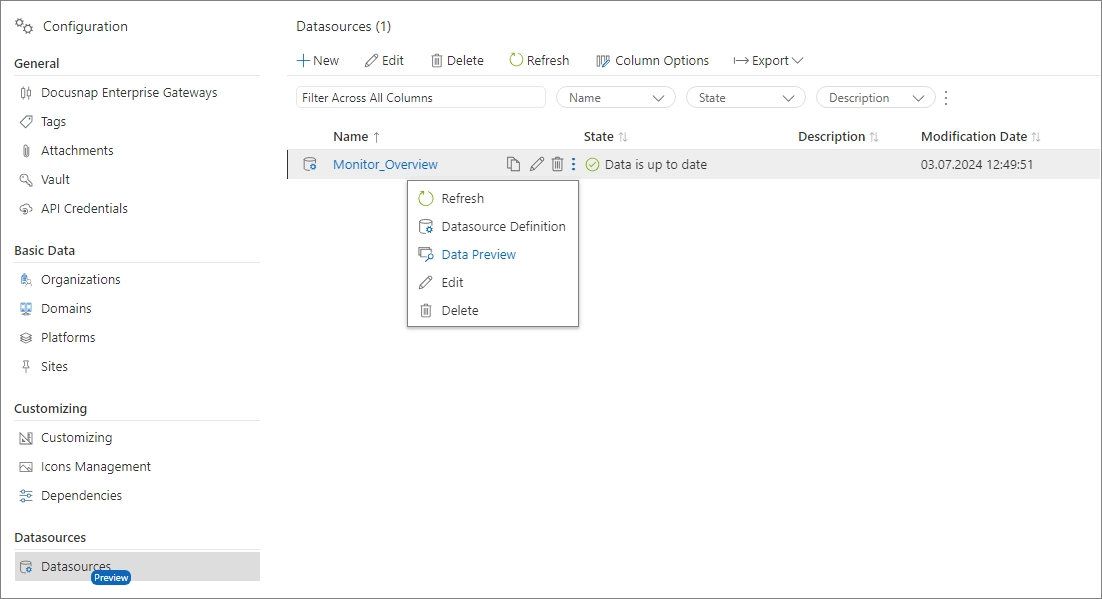
Once the data has been extracted, transformed, and saved according to the data source definition, a message will appear in the notification center. The status of the data source is changed to “Data is up-to-date.” The context menu of the relevant data source can display a preview of the extracted information. More information about tables and properties can be read here.

Data Source for Workstations and Their Connected Monitors
Create Data Source
To define a data source in Docusnap365, click on the gear icon in the upper right corner and open configuration. Under “Data Sources and Reports,” select “Data Sources,” which will display a list of existing data sources.
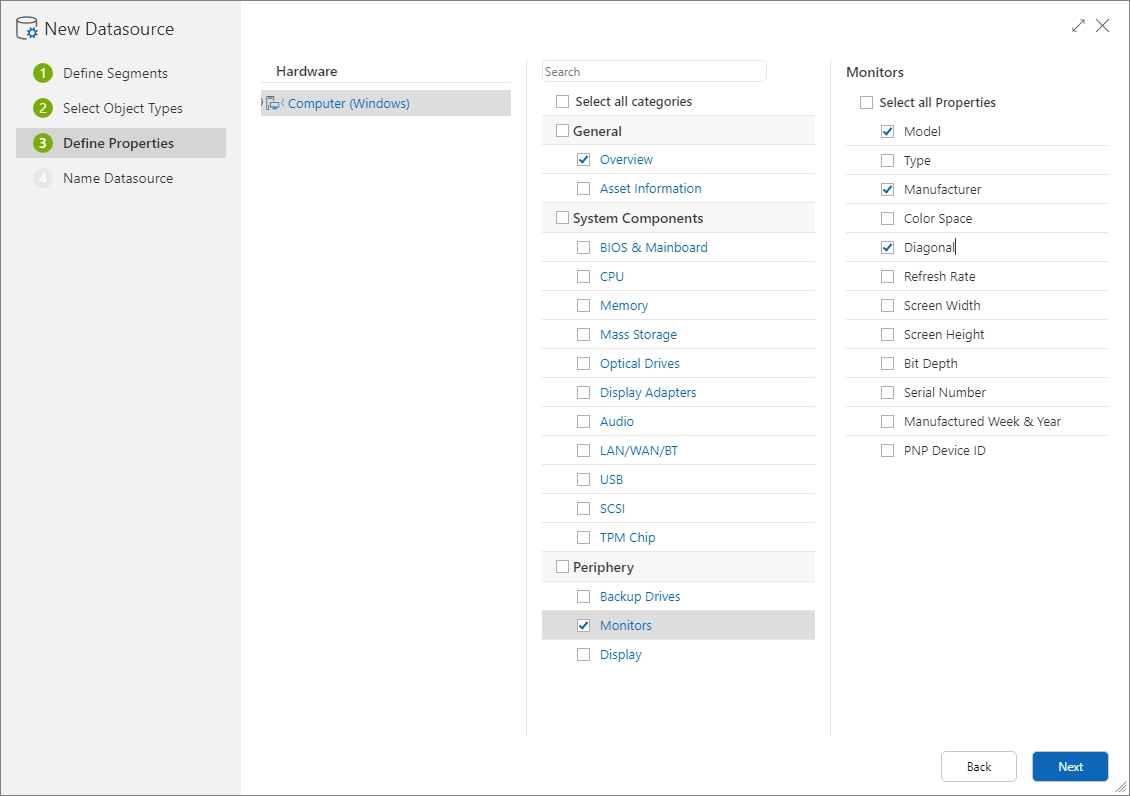
- Click “New” to start the data source creation wizard:
- Select segment: “Hardware”
- Set object type: “Computer (Windows)”
- Select properties:
- Overview area: Fully Qualified Hostname, Operating System Name, Serial Number
- Monitor area: Model, Manufacturer, Diagonal
- Enter data source name: “Computer_Monitors”
- Save data source

Data Source Preview
Once the data has been extracted, transformed, and saved according to the data source definition, a message will appear in the notification center. The status of the data source is changed to “Data is up-to-date.” The context menu of the relevant data source can display a preview of the extracted information. More information about tables and properties can be read here.
